Layers of cream, poached cherries and rich dim chocolate make this conventional German Black Forest cake a completely tasty, liberal and show-halting creation. This wanton cake tastes just as unimaginable as it looks and is ensured to awe even the hardest of faultfinders. This thump out excellent may look complex, yet you can figure out how to make it with this clear formula. This Black Forest cake tastes as good as it looks.
Ingredients: For the Poached Cherries
1/2 cup superfine (caster) sugar
1/2 cup water
1 pound / 450 grams fresh or frozen pitted cherries, plus extra for decorating
6 tablespoons Kirsch liqueur, optional
Ingredients: For the Cream Filling
10.2 fluid ounces / 300 milliliters heavy cream
3 tablespoons powdered (icing) sugar, plus extra for decorating
Ingredients: For the Ganache
Step 1: Measuring the Ingredients
Baking is a science, so carefully measure out all of your ingredients beforehand for the best results.
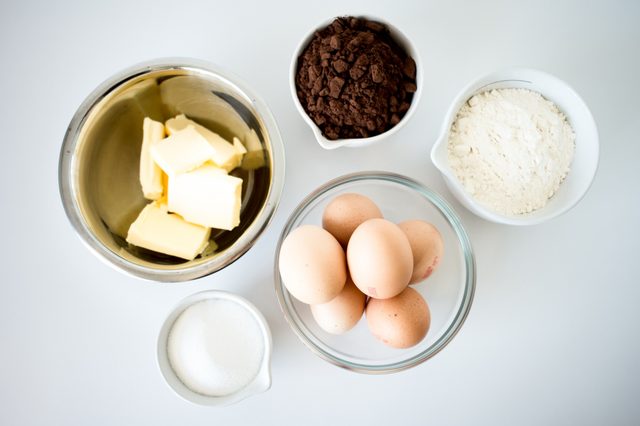 Carefully measure your ingredients beforehand.
Step 2: Preparing the Pans
Heat the oven to 335 F / 170 C. Grease and line two 7-inch / 18-centimeter round cake tins and set aside.
Tip
 Grease and line your cake tins.
Step 3: Melting the Butter
In a small saucepan set over low heat, melt together the butter and vanilla extract. Set this mixture aside to cool.
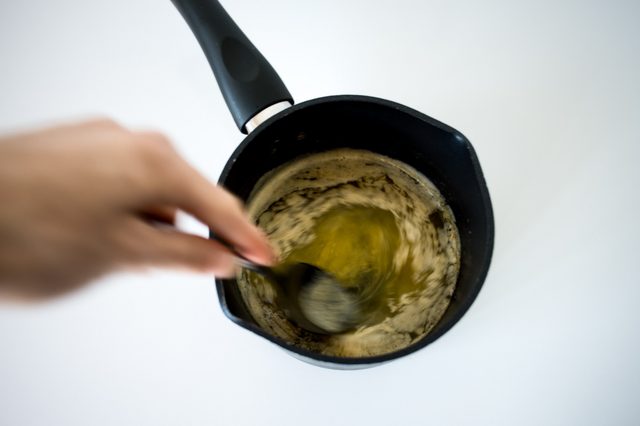 Melt the butter and vanilla over low heat.
Step 4: Combining the Eggs and Sugar
Place the sugar and eggs in a large bowl. With an electric hand mixer, whisk them together on a low speed to just combine.
 Whisk the eggs and sugar to combine.
Step 5: Whisking the Eggs and Sugar Over Heat
Set the egg mixture over a pan half-filled with boiling water. Continue to whisk on low speed for 3 minutes, and then increase the speed to medium and whisk the mixture until it is pale and tripled in volume.
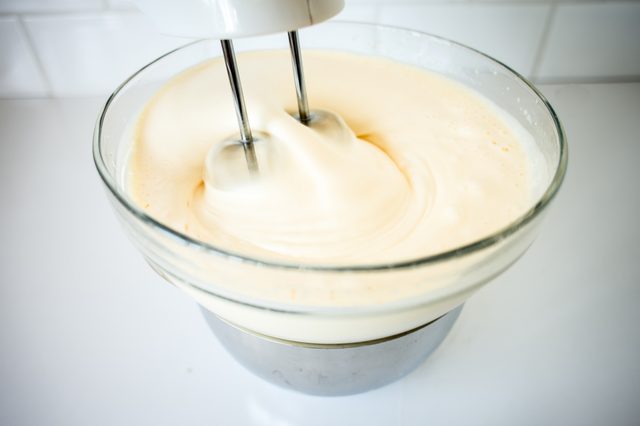 Whisk until the mixture is pale and tripled in volume.
Step 6: Cooling the Egg Mixture
Remove the bowl from above the hot water, and continue to whisk until the mixture has cooled to room temperature -- about 3 to 4 minutes. The mixture will be thick and leave a ribbon trail when the beaters are lifted out of the bowl.
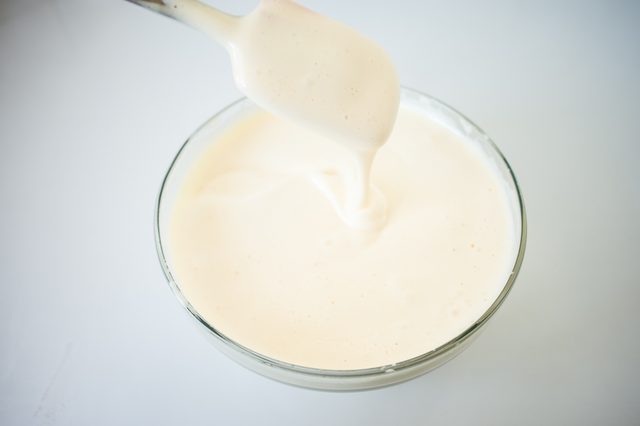 The mixture should be thick so that it leaves a trail.
Step 7: Adding the Melted Butter and Flour
Pour the melted butter down the sides of the bowl, and gently fold it in. Sift in the flour and cocoa powder, and gently fold the batter again until the flour is just incorporated.
Warning
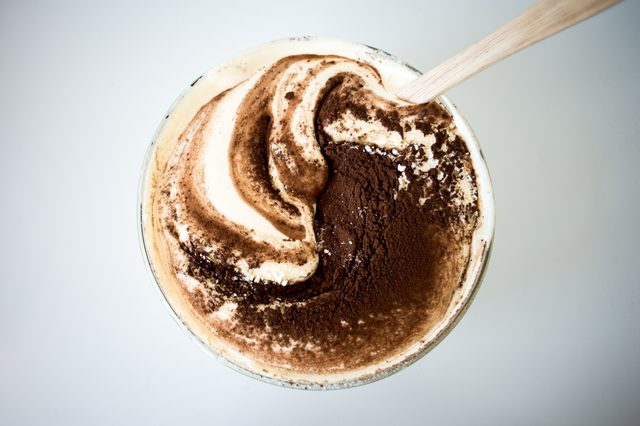 Gently fold in the dry ingredients.
Step 8: Baking and Cooling
Divide the mixture evenly between the cake tins, and bake in the oven for 25 to 35 minutes or until the cake rises and springs back when gently pressed in the center. Leave the cakes to cool in their tins before inverting onto a wire rack.
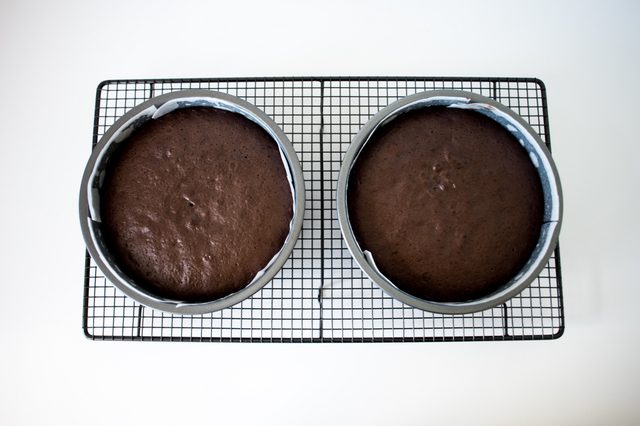 Let the cakes cool in their tins.
Step 9: Making the Poached Cherries
While the cakes are cooling, make the poached cherries. Heat the sugar and water in a small saucepan set over low heat until the sugar has dissolved. Add the Kirsch liqueur and cherries, and bring the mixture to a gentle simmer. Continue to cook for 3 to 4 minutes or until the cherries have absorbed some of the syrup and are puffed and tender. Strain the cherries and the syrup into two separate bowls, and set both aside to cool.
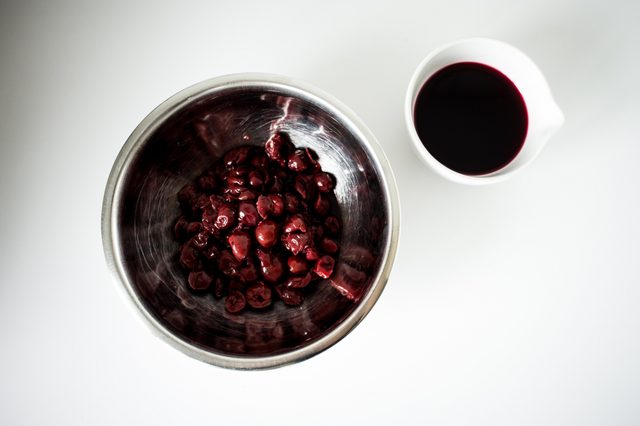 Set the cherries and syrup aside to cool.
Step 10: Making the Chocolate Ganache
To make the chocolate ganache, place the chopped chocolate in a small bowl. In a small saucepan set over medium heat, bring the cream to a gentle simmer. Pour the hot cream into the bowl with the chocolate. Let sit for 1 minute before gently stirring to combine.
 Pour the hot cream over the chopped chocolate.
Step 11: Making the Cream Filling
For the cream filling, add the cream and powdered sugar into a large bowl and whisk until the cream begins to just hold its shape.
 Whisk the cream until it begins to hold its shape.
Step 12: Glazing the Cake Layers
To assemble the cake, place the first cake layer on a plate or stand and brush it generously with cherry syrup.
 Glaze the first cake layer with syrup.
Step 13: Filling With Cream and Cherries
Generously spoon 3 tablespoons of the cream on top the first cake layer, leaving a slight border around the edge. Arrange the poached cherries on top of the cream.
 Arrange the cherries on top of the cream.
Step 14: Top With the Second Cake Layer
Add the second cake layer. Brush again with cherry syrup, and then pile on the cream and extra cherries.
 Top with the second cake layer.
Step 15: Decorating the Cake
Finish the cake by pouring on the chocolate ganache, adding a generous dusting of powdered sugar and sprinkling with extra shaved chocolate.
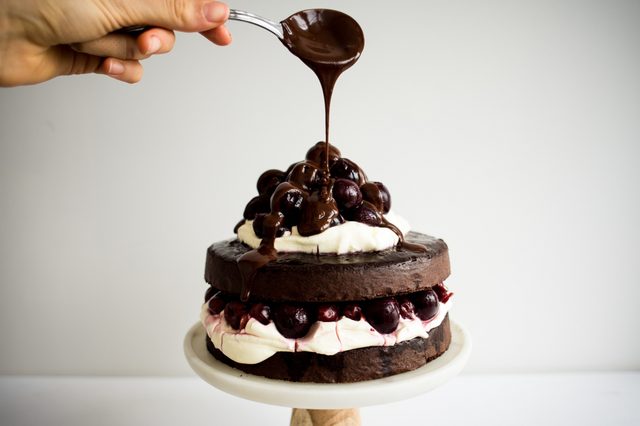 Top with chocolate ganache.
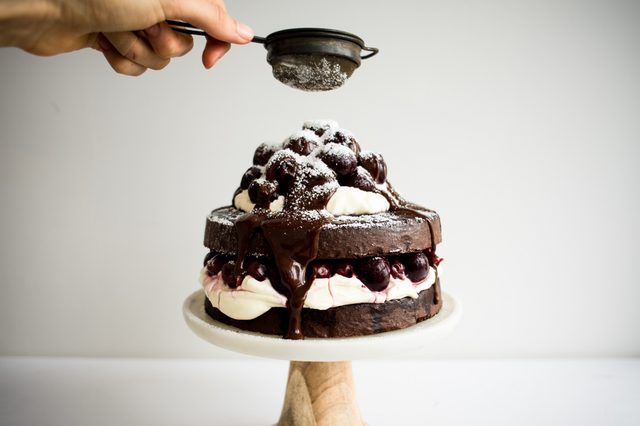 Dust with icing sugar.
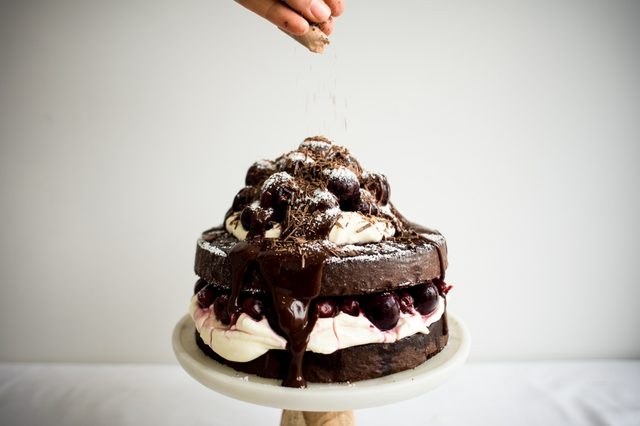 Sprinkle with shaved chocolate.
Step 16: Serving
Chill the cake for 1 hour to make it easier to slice, taking it out of the refrigerator 20 minutes before you plan on serving it.

Chill the cake before serving to make it easier to slice.


